原创ai中使用平滑工具的详细操作方法
刚刚下载使用ai的同学们,可能对此款软件还不是很熟悉?今日在此文中就为你们呈现了ai中使用平滑工具的详细操作方法。
首先打开软件
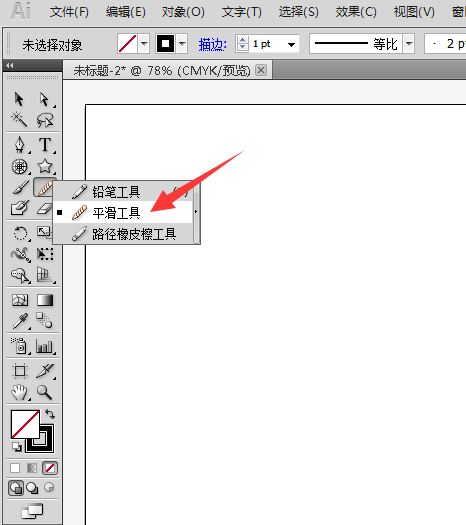
然后小编通过一个例子演示平滑工具的使用,先新建文件,在左侧工具箱中找到平滑工具。
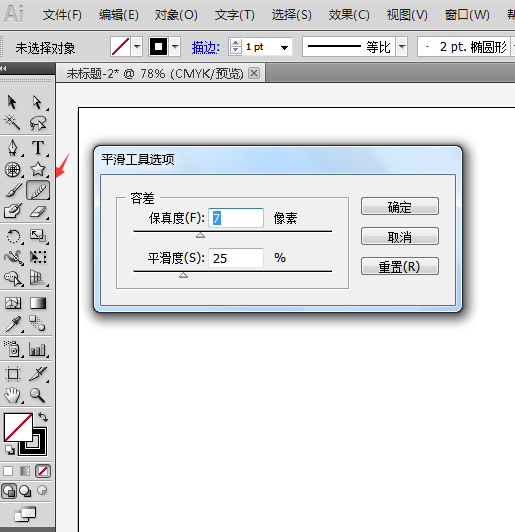
接着双击平滑工具的图标可以弹出平滑工具选项框,可以对保真度,平滑度进行设置。
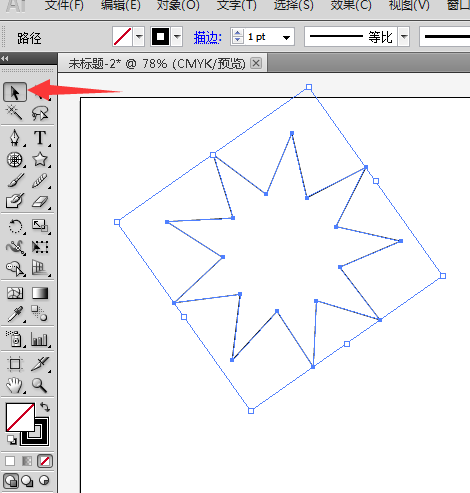
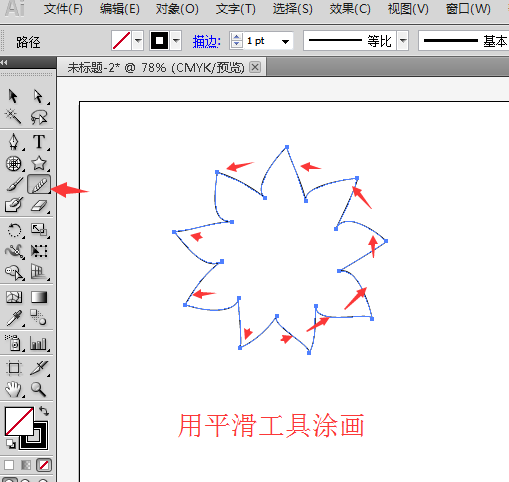
然后我们先在工具箱中选择星形工具。

接着在画布中画出星形形状,要保证形状被选择中的状态下,点击平滑工具。
这时候用平滑工具在星形上涂抹,可以看见星形的线条发生了变化,变得平滑有弧度。
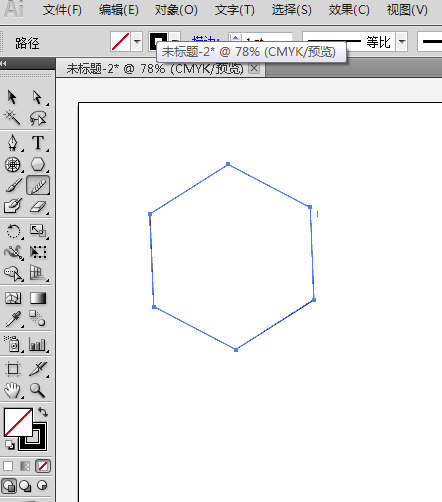
我们再用多边形来试一下,用多边形工具画出一个多边形。
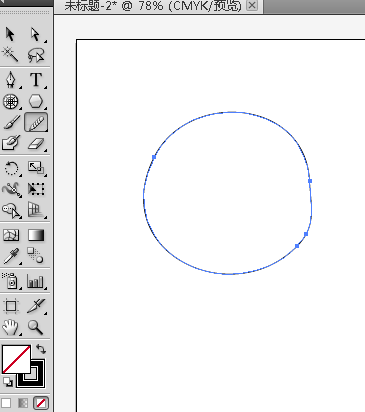
最后在多边形被选择下,用平滑工具涂抹,多边形变成了圆形。
依照上文讲解的ai中使用平滑工具的详细操作方法,你们是不是都学会啦!